IdP Configuration
Microsoft Entra ID (Azure AD) Configuration
- Login to your “Microsoft Azure Portal”.
- Select Manage -> “Enterprise Applications” from the left menu.
- Click the “New Application” button on the Enterprise Applications page.
- Click the “Create your own application” button.
- Enter a recognizable application name such as “StartLeft-SSO” and select “Integrate any other application you don’t find in the gallery (Non-gallery)”.
- Click the “Create” button.
- Select Option 2. “Set up single sign on”
- Select “SAML” as a single sign-on method.
- Click the “Edit” button in the “Basic SAML Configuration” panel.
- Fill in the “Entity ID” and “Assertion Consumer Service URL” fields and click the “Save” button.
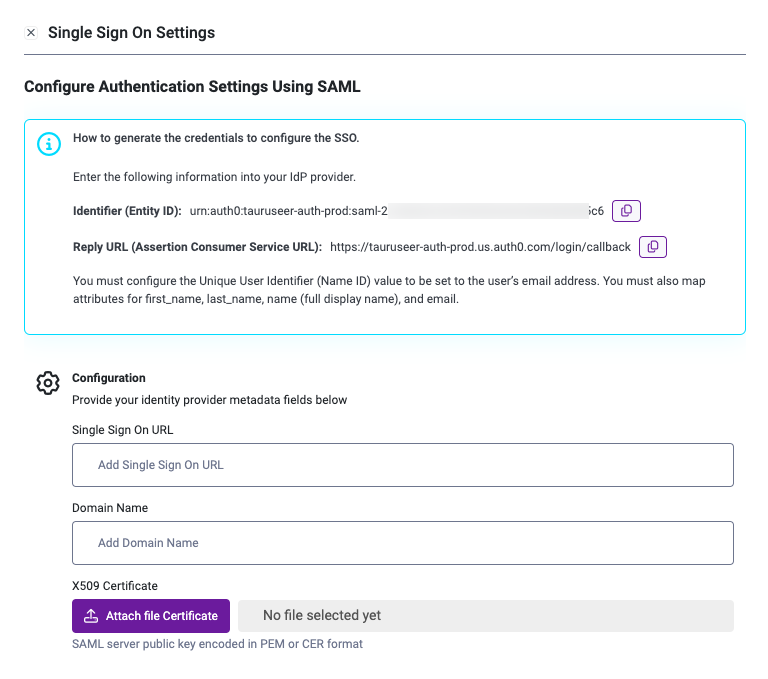
- Download the public key certificate in Base64 format and ensure the file extension is saved as .pem
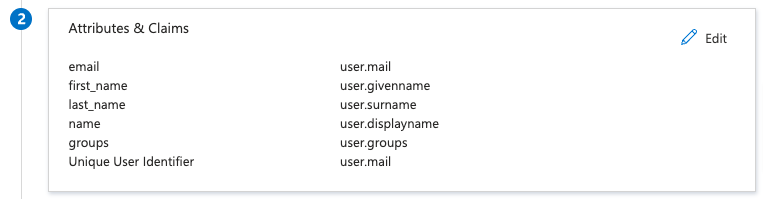
Configure Attributes & Claims
In Entra ID, you must configure the Unique User Identifier (Name ID) value to be set to the user’s email address, in Azure AD this value must be set to user.mail- email - set to user.mail
- first_name - set to user.givenname
- last_name - set to user.surname
- Set the Single Sign On URL to the App Federation Metadata Url or Login URL from Entra ID
- Set the Domain name to your company’s domain.
- Upload to the X590 Certificate.
- Click Save SSO Settings.