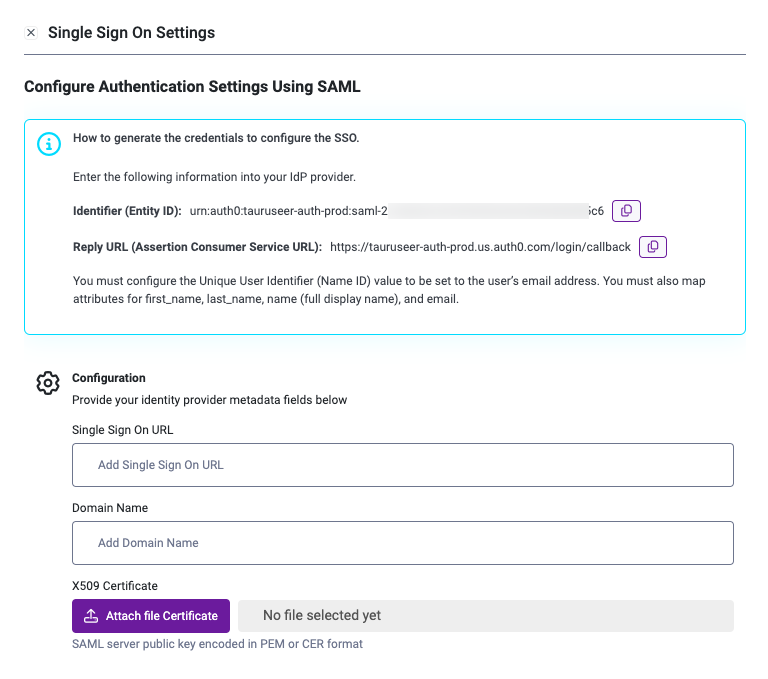
IdP Configuration
Google Workspace Configuration
- In the Google Admin Console go to Apps > Web and mobile apps.
- Click the Add app dropdown and select Add custom SAML app.
- Choose an App name and click Continue.
- Skip the Metadata download for now and click Continue.
- Fill in the fields ACS URL and Entity ID with the information provided in Start Left.
- Be sure to set the Name ID format to EMAIL and click Continue and click Continue.
Configure Attributes
- Click the Add Mapping button.
- Select First Name in the dropdown and enter first_name in the App attributes field.
- Click the Add Mapping button.
- Select Last Name in the dropdown and enter last_name in the App attributes field.
- Click the Add Mapping button.
- Select Primary Email in the dropdown and enter email in the App attributes field.
- Click Finish.
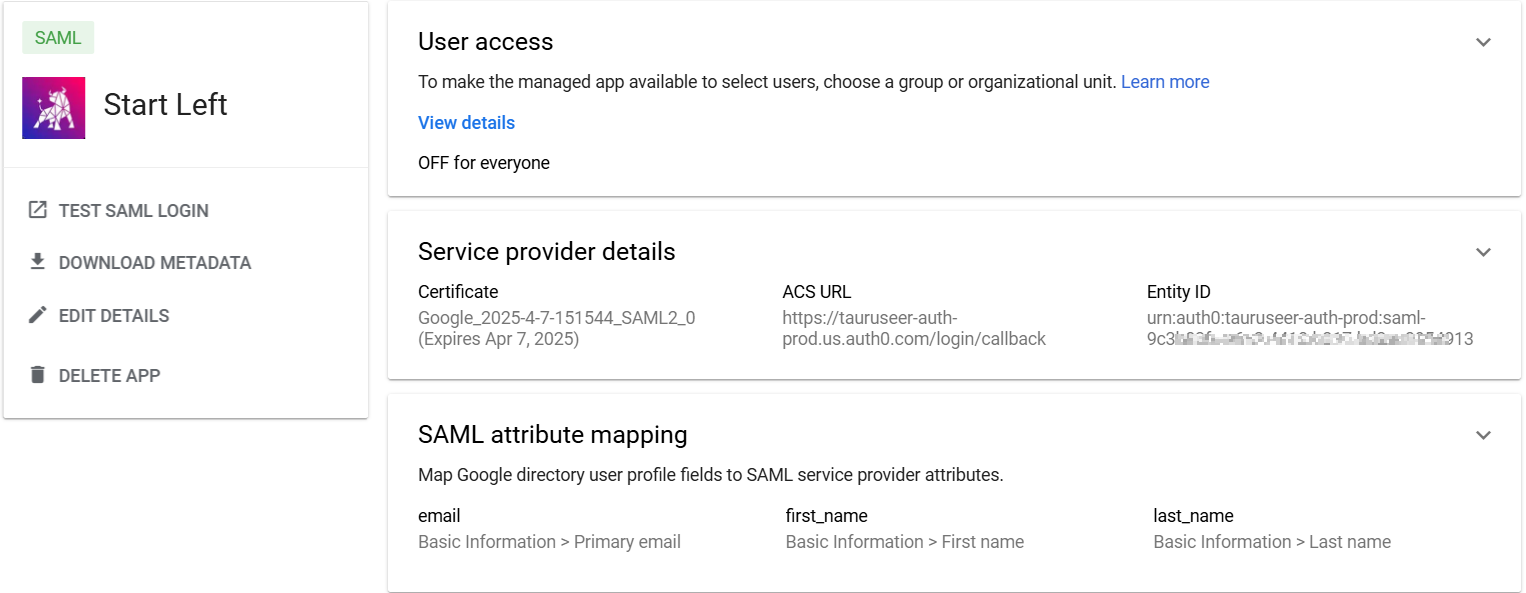
User access
- Now you should be on the detail page of your newly created app.
- Expand the User access section and define the subset of users that should have access to the application.
- Expand the Service provider details section.
- Download the signing certificate and ensure the file extension is saved as a .pem file.
In the Start Left Platform:
- Set the Single Sign On URL from Google Workspace.
- Set the Domain name to your company’s domain.
- Upload to the X590 Certificate.
- Click Save SSO Settings.